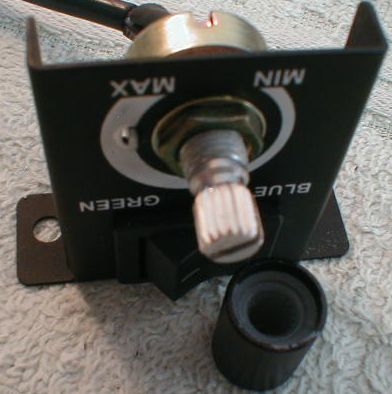
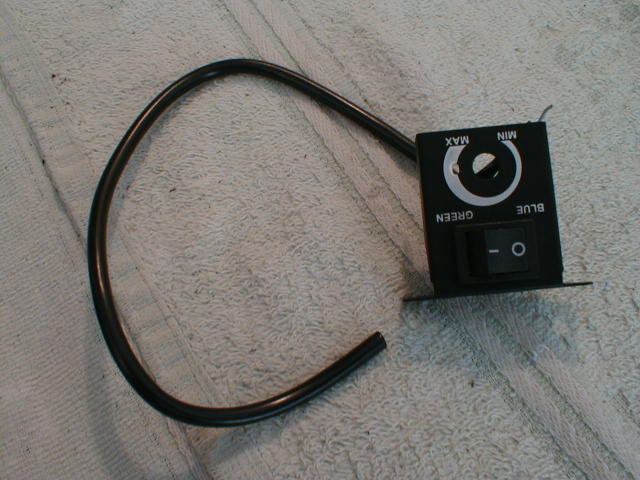
Are you tired of this thing like I am?
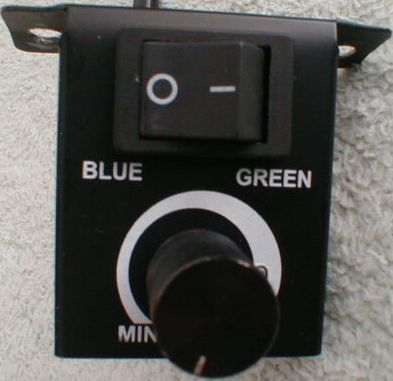
If you're willing to give up the ability to switch between green and blue, and if you have some soldering skills you can get rid of it easily.
tools you will need:
Soldering iron (with appropriate skills to use it)
wire cutters
wire stripers
1. Remove the heatshrink from the wires behind the panel.

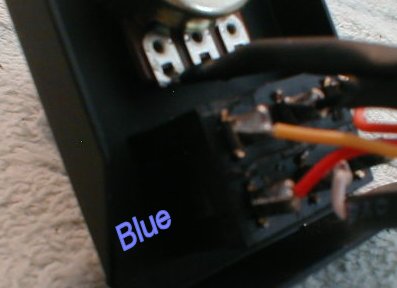
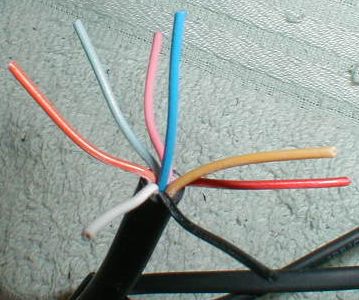
Now take a look at the wire colors here.
Since not all gauges are the same, yours may not look like this.
if it doesn't I recommend taping up the wires and quitting cause these instructions do not cover your type of gauges.
the wires on the side of the switch that is labled "Blue"
the wires on the side of the switch labled "Green"
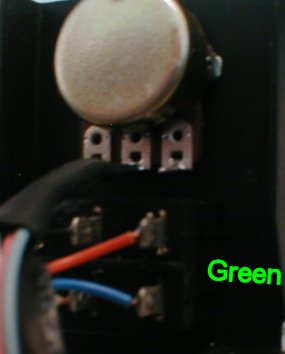
wires tired to the pot.
One again make sure your wire colors are exactly as shown.
If they're not you might be able to use these instructions as a guide if you replace the wire color I mention with the one you have on your gauges in that exact same location.
2. Cut off the cable that runs from the main unit to the control panel like this.
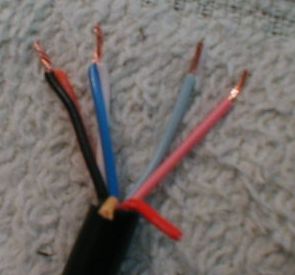
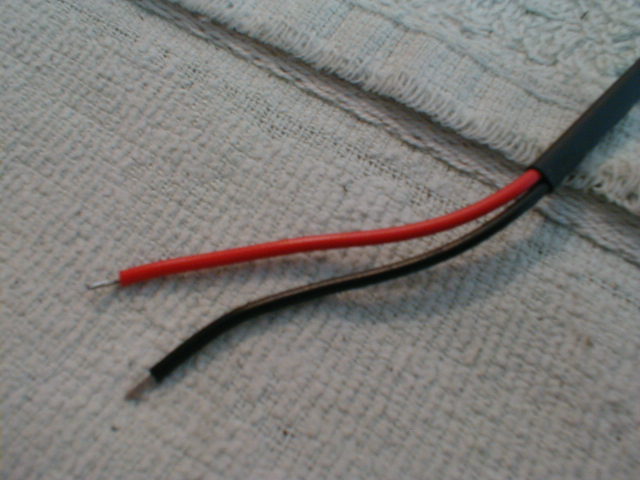
3. Carefully strip off the outer insulation from the wires.
4. Strip a little insulation from the ends of each wire.
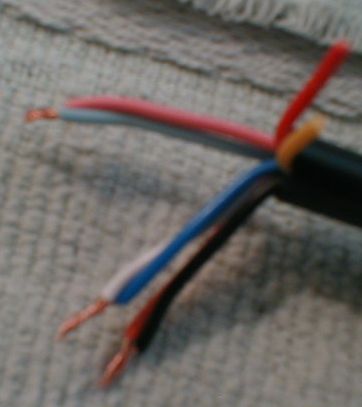
For the gauges to remain in the Blue setting connect the dark blue with the white wire, and the black with the orange wire. Cut the red and yellow wire short, you will not be using them.
For the gauges to remain in the Green setting connect the red wire with the white wire, and the black wire with the yellow wire. Cut the dark blue and orange wire short, you will not be using them.
I don't like the green setting on mine so I went for blue.
5. If you want the gauges to be full on when the dimmer is set to full on, just connect the pink and light blue wire, and skip to step 10.
the problem with this is when the dimmer is full down the glow gauges will be about half way down.
So if you're like me and you run the gauges lower than half all the time, hook up the pot like it was and adjust it to your liking then leave it behind the dash.
6. Pull on the knob on the panel to slip it off
7. Remove the nut and washer holding the pot to the panel.
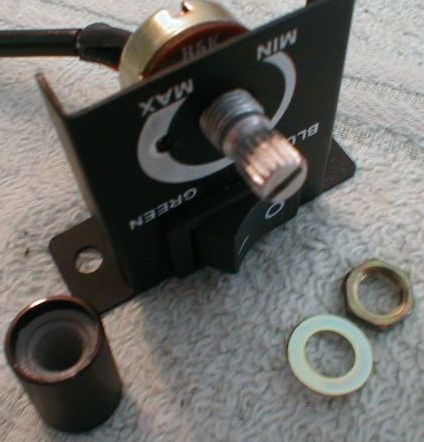
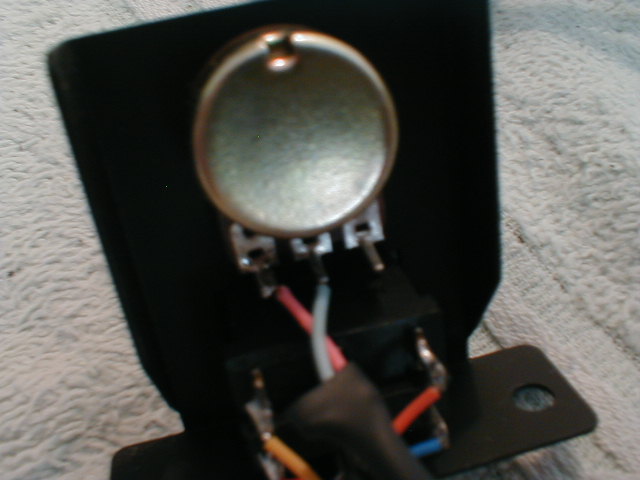
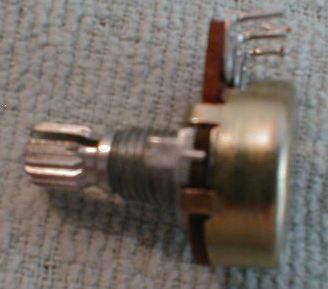
8. Cut off the two wires and you should have this...
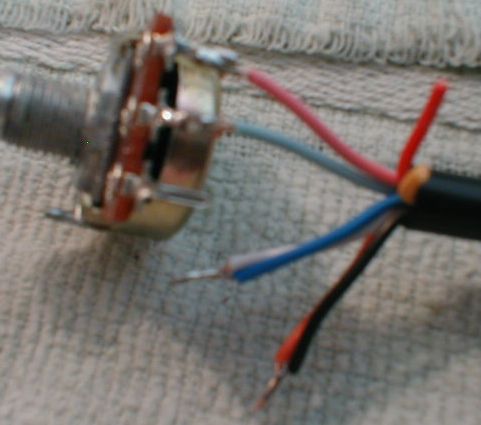
9. Solder the light blue and pink wires to the pot like this.
10. Be sure to solder all the connections and tape everything up.
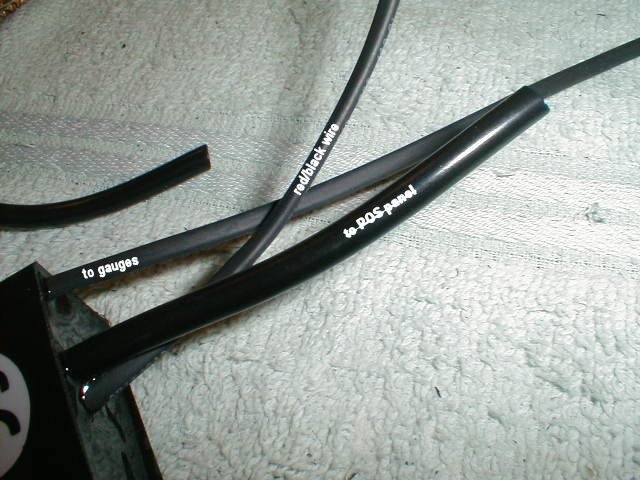
the two wires that need to be connected yet are the two main power wires.
this part is specific for the EG civic, the wire colors will differ for other vehicles.
Behind your dimmer you will find these wires.
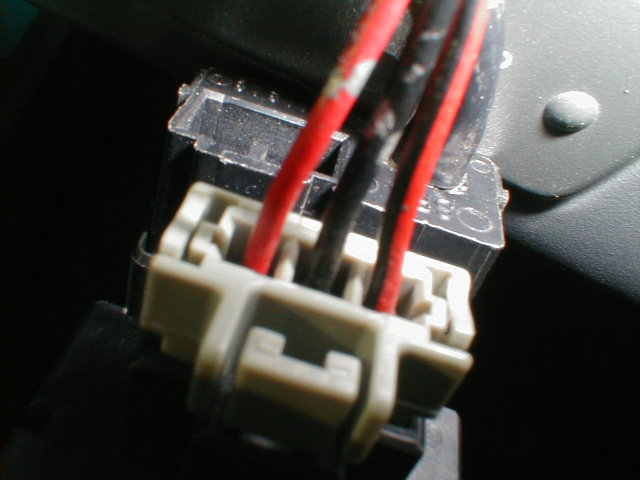
11. Connect the red wire from the gauges to the red/black wire of the dimmer plug, and the black wire of the gauges to the red wire of the dimmer plug.
Plug everything in like it should be, switch on the headlights and adjust the pot to your liking (if you installed it) and tuck everything up in the dash.
and lastly put this thing where it belongs.
in the garbage can.
last update 10/10/2004